ad
Contrary to what some people think, Google Earth is not just a 3D model of our planet. It allows us to view and analyze images of the globe without leaving home. In addition to being widely used by scientists to carry out various research and even make predictions of different events linked to the planet.
If you’re fascinated by the world around us and want to explore the Earth in a unique way, Google Earth is the perfect tool for you. In this in-depth guide, we’ll dive deep and explore how to use Google Earth to view satellite imagery. Let’s unveil all the features and secrets that this incredible tool has to offer. So, sit back and we’ll start browsing now!
Introduction to Google Earth
Before we start browsing, it is interesting that you know that Google Earth is a computer program, whose main function is to present users with a three-dimensional model of the Earth’s globe. The program can be used as a generator of satellite images and two-dimensional maps or even as a simulator of infinite landscapes of our planet. With it we can easily identify buildings, cities, landscapes, places and much more.

Introduction-to-Google-Earth Source: (Canva)
Downloading and installing Google Earth
To enjoy all of Google Earth’s features, you just need to download the app to your device. See the steps below:
- Go to your cell phone’s app store (Google Play or App Store).
- Write the name of the application in the search bar and wait.
- As soon as the app appears on the screen, click “Install”.
- Wait a few seconds for the download to complete.
- Ready! The application is now available on your device.
Now that you’ve installed Google Earth, it’s time to dive into the features it offers.
Exploring the world
With the app already installed on your device, I’ll show you the main features that will help you explore the world without leaving home. So let the fun begin!
Simple Navigation
As soon as you enter the application for the first time, a view of the globe appears. You can place your finger on the screen and swipe in all directions until you find the place you want to explore. When you find it, double click on it. You will see how the name of the country appears in a moment, and when you click on it again, the name of the cities appears. So, just click on a city to start viewing satellite images.
Zoom in and out
To enlarge or reduce an image, you can use the pinch gesture on your screen. To do this, spread your fingers apart to zoom in and bring them closer together to zoom out. It is also possible to use the zoom feature using just one finger. If you want this option, double-tap, hold your finger on the screen, and swipe up or down.
Location search
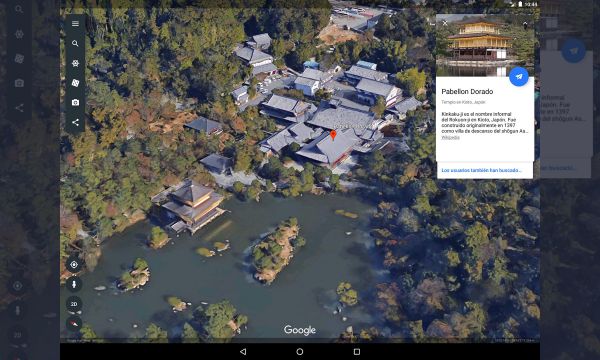
Another way to navigate the application is by searching for a specific location. At the top of the screen you will find a magnifying glass next to other navigation features. Click on it and write in the search bar what you want to search for: avenues, parks, cities, neighborhoods, tourist attractions, etc. So, just wait a few seconds until the platform presents you with the results of your search.
Street view
You may have already used the “Street View” tool on Google Maps. Know that it is also available on Google Earth so you can have a wide view of the street. This function gives the sensation of walking along avenues, streets or roads. The images shown are certainly not in real time, however they represent quite faithfully the details of the moments in which the photos were taken.
To use the feature, first write the location you want to search in the search bar (magnifying glass). Once it appears on the map, click on the person-shaped button in the bottom right corner of the screen. Therefore, you can tap on any location highlighted in blue to enter “Street View” and visit the place.
Viewing satellite images
With Google Earth you can explore different areas of the globe and everything in high resolution using the platform. It is worth mentioning that the update and quality of images may vary depending on the area.
The platform has many images taken by satellites that orbit the Earth. These images are captured by several companies, and the photos are generated over the days, months and years, to then be combined into a mosaic.
Activating satellite images
To see the most recently added satellite images, on the home screen, click on “Traveler”, next to the magnifying glass, at the top. Soon, several options will appear on the screen, go to the last one, “Satellite images in Google Earth” and click on it.
Next, an image of the globe will appear, which you can slide with your finger and find the place you want to see. The most recent images are highlighted on the map with a yellow colored area. To enlarge the image, simply make a pinch gesture with your fingers. This way you will be able to zoom in on the chosen area.
Exploring historical images
In the same way, it is also possible to travel through time and see what certain places were like in the past. This feature is quite interesting, as it also allows us to view all the impacts we have left on Earth since 1984.
The “Timelapse” function basically allows you to travel through time using the platform. Through images in a 3D video it is possible to take a tour and see the changes that have occurred. There are more than 15 million images collected by five satellites in recent decades.
To start the “tour”, click on the “Traveler” button again and choose the “Timelapse” option. Then click on “Featured locations” and check out the available videos. It’s really very interesting to see in a matter of seconds how everything changes over the years. It is worth checking!
Tagging and sharing locations
Another very interesting feature of Google Earth is that it allows you to mark your favorite places on the map and share them.
Adding bookmarks
Adding a marker is very simple. Tap the screen and drag your finger to navigate the map until you find the location where you want to add a marker. Once you find the location, tap and hold the location on the map where you want to place it. This way you will fix a marker in that position.
Sharing locations
If you wish, you can also share locations with anyone you want. Check out a detailed step-by-step guide below:
- Use the app’s navigation controls to find the location you want to share.
- Tap the location or marker you want to share.
- Then, at the bottom of the screen, an information bar regarding the location will appear. Tap the share icon.
- Choose one of the options to share the location. It can be through email, messaging applications, social networks or other available options.
- Follow the sharing instructions for your chosen method.
- Ready! Your location will be shared in seconds.
Tagging-and-sharing-locations Source: (Canva)
Conclusion
Wow, what an exciting trip! As you can see, Google Earth is a powerful tool that allows us to explore our planet in a unique way. You can easily download it to your mobile device, explore the world in just a few taps, and even share special locations with friends and family. Have fun exploring the Earth from the palm of your hand and discover its wonders. The world is at your fingertips. Enjoy!